
Integrating Java- and Mono-based Microservices Using Docker
New JNBridge R&D Lab Shows How to Deploy Both Java and .NET Sides of a JNBridgePro-Enabled Application as a Docker Container
Introduction
Container technology, and Docker in particular, has been gaining a lot of attention recently as a substantial advance in the deployment of enterprise software. In particular, containers finally make microservices practical, due to the fact that containers are much less resource intensive than full-fledged virtual machines. Running each microservice in its own virtual machine would consume more storage, memory, and processor cycles than would be warranted for the relatively small amount of functionality embodied in the microservice, while placing each microservice in a container is a much more appropriate use of resources.
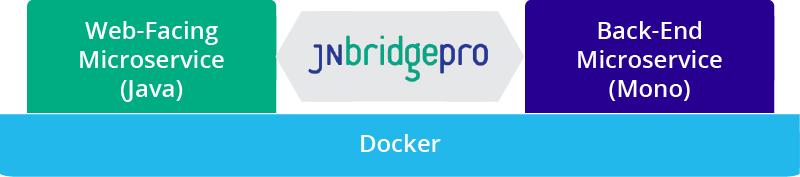
When applications use JNBridgePro, their .NET and Java sides in many instances can be thought of as microservices, communicating via the JNBridgePro TCP/binary or HTTP/SOAP channels. In this lab, we are going to take an application that uses JNBridgePro, and show how the .NET and Java side can each be deployed as a Docker container, and how they can be set up to interact with each other and with the outside world.
We’ll be Dockerizing the book inventory system example from the previous lab. Recall that the front end ran on Java and used the Play Framework to create a web application, while the back end used .NET to implement business logic. Since Docker is Linux-based, we’ll be using Mono to run the back-end container, rather than the true .NET Framework.
First, we’ll show how to create the Docker images for the Java and .NET sides. Then, we’ll show how to set up and run the images so that your web application runs entirely inside Docker containers. This is not a Docker tutorial, but such tutorials are available on the Docker website. By the time you’re done with the lab, you should know enough to Dockerize your own JNBridgePro-enabled applications, but there is much more to learn about Docker.
To start, download and install Docker on your machine. Also, download the files for the book inventory system project. We’ve slightly tweaked the files so that they’ll run on Linux and Mono, but otherwise they’re identical to the project from the previous Play Framework lab.
At this point, please request a JNBridgePro evaluation license file for use with Docker. It’ll be different from the JNBridgePro license you’re currently using.
Build the images
We’ve actually pre-built the images for the .NET and Java sides, and placed them in the Docker Hub repository, but we think it’s important to learn how these images were constructed, so that you can Dockerize your own application and build its images. However, if you want to use the pre-built images and just learn how to set them up and run them, feel free to skip this section and move on to the next one.
Build the Java side
Before we start building the Java-side image, let’s look at the Java-side code. Unpack the downloaded zip file containing the project files. Look in the folder javaSideDocker, and you’ll see a folder book-demo: that’s the Java-side Play application. If you examine app/controllers/HomeController.java, you’ll see that we’ve modified the calls to DotNetSide.init(). They’re now
DotNetSide.init("./lib/jnbcore_tcp.properties");
Note first that we’re using a relative path, since the application should be able to run wherever it’s copied. The path is relative to the base folder for the web application. Also note that we’ve changed the path to use forward slashes. This is Linux and is what’s expected.
Now, examine lib/jnbcore_tcp.properties. Note that the dotNetSide.host property is no longer set to localhost, but is now
dotNetSide.host=dotnet
Since we’re running the .NET and Java sides in different containers, they’re no longer considered the same “machine,” and we can’t set the property to localhost. “dotnet” is the hostname we’ll assign to the .NET-side image when we run it, so we include that in the properties file.
Start by launching a Docker Quickstart Terminal. (Docker should have installed an icon for this on your desktop.) If the Docker server hasn’t started yet, launching the Quickstart terminal will cause it to be started.
Docker provides many pre-built images, both provided by the Docker company and by the community. There are several available images with the Play Framework already installed. Let’s choose one and download it to the Docker server. Enter the following command line into the Quickstart Terminal window and press Enter:
$ docker pull ingensi/play-framework:latest
This may take a while to complete, but when it’s done, you’ll have a local copy of the most recent image containing an installation of Play (presumably with the most recent version of Play installed), along with an installed JDK and any other necessary software.
Now, we’ll build an image containing the Java-side part of the project. Docker provides an automated way to do this, using instructions contained in a Dockerfile. If you look inside javaSideDocker, you’ll see a Dockerfile containing the following lines:
FROM ingensi/play-framework:latest
 ADD b /app
This Dockerfile, when it is run, tells Docker to first download the latest Play Framework image if it isn’t already on your machine (we didn’t actually have to pull the image previously, but I wanted to show you how it was done). It then copies the contents of the folder b (that is, the folder book-demo that’s inside it) into the folder /app on the ingensi/play-framework image. To execute the Dockerfile, first navigate to the folder containing the Dockerfile (javaSideDocker, but your path may differ from the one I use) and issue a build command:
$ cd Desktop/javaSideDocker
 $ docker build -t booksdemo-javaside .
You will now have an image on your local machine that’s named booksdemo-javaside, that’s built on the ingensi/play-framework image, with the addition of the book-demo files copied into the /app folder. You can see this new image, along with any other local images, by entering the following command:
$ docker images
That’s it for the Java side.
Build the .NET side
We can build the .NET-side image using Dockerfiles, too, but this time we’ll do it by hand, to show what’s involved in doing it that way.
First, download a Docker image containing the latest version of Mono:
$ docker pull mono
Next, let’s examine the .NET-side files for the project. They’ll be in the dotNetSideDocker folder that you extracted from the downloaded project zip file. In addition to the necessary JNBridgePro .NET-side components, there’s the .NET-side class library (BookService.dll – see the Play Framework lab for source code), JNBDotNetSide.exe.config (already configured), and a special file config. If you open it, using WordPad, you’ll see a bunch of mappings from Windows DLLs to Linux libraries. This is used to tell Mono which Linux library to use whenever an unmanaged Windows DLL is referenced. A version of this file is already included in the Mono image, but we need to add two additional JNBridgePro specific entries:
<dllmap dll="jnbauth_x86.dll" target="jnbauth_x86.so" os="!windows" />
<dllmap dll="jnbauth_x64.dll" target="jnbauth_x64.so" os="!windows" />
We’ve included the config file inside the DotNetSide folder. The folder also contains the Linux libraries.
At this point, locate the JNBridgePro evaluation license file for Docker that you obtained from JNBridge, and place it inside the DotNetSide folder.
We’re going to run the Mono image, but first we need to navigate to the dotNetSideDocker folder:
$ cd Desktop/dotNetSideDocker
 $ docker run -it --name=dotnet mono bash
The above command starts the mono image in a container named “dotnet” and running the bash shell.
Once we’ve created the dotnet container, we’ll suspend it so that we can copy the DotNetSide files into it:
$ <Ctrl-P><Ctrl-Q>
 $ docker cp DotNetSide dotnet:/usr/local/
This copies the DotNetSide folder and its contents into the /usr/local directory in the dotnet container.
Next we restart dotnet and reattach the terminal session:
$ docker start dotnet
 $ docker attach dotnet
Now we’re back in the dotnet container using the bash shell. We need to move three files that we’ve just copied over:
$ cd /usr/local/DotNetSide
 $ mv config /etc/mono/
 $ mv jnbauth*.so /usr/lib/
This puts the config and jnbauth Linux libraries in the places where they’re required in order to run Mono.
Now we’re set up, so we can quickly test the .NET side:
$ mono JNBDotNetSide.exe
 JNBDotNetSide, Copyright 2004-2015, JNBridge, LLC
 Starting .NET-side server
 Hit <return> to exit
If you see that, everything is set up properly. Note that the text above might disappear from the terminal window, but that’s ok. Let’s exit the .NET side for now: hit <return>, and you should see the command-line prompt.
We’ve new built our .NET side, so we can save it away as a new image that we can run whenever we want. First we suspend the container, then we commit the image:
$ <ctrl-P><ctrl-Q>
 $ docker commit dotnet test-booksdemo-dotnetside
We now have a new image test-booksdemo-dotnetside, as we can easily see by listing our images:
$ docker images
At this point we should clean up after ourselves. This isn’t strictly necessary, but we want to get our Docker installation into the same shape that it would be if we simply downloaded the pre-built images:
$ docker stop dotnet
 $ docker rm dotnet
Download the pre-built images
If you’ve already gone through the process of building the images, you can skip this section.
We’ve pre-built images for the books demo Java and .NET sides, and placed them in the repository. Downloading them is simple. Make sure you have a Docker Quickstart terminal window open:
$ docker pull jnbridge/booksdemo-javaside
 $ docker pull jnbridge/booksdemo-dotnetside
The only thing that’s missing from the images is the evaluation license file that needs to be added to the .NET-side image. First, navigate to the folder containing the license file, and run the image:
$ cd Desktop/dotNetSideDocker/DotNetSide
 $ docker run -it --name=dotnet booksdemo-dotnetside bash
Suspend the image, and copy the license file over (let’s assume it’s called eval.lic):
$ <ctrl-P><ctrl-Q>
 $ docker cp eval.lic dotnet:/usr/local/DotNetSide
Then let’s update our image and remove the dotnet container
$ docker commit dotnet test-booksdemo-dotnetside
 $ docker stop dotnet
 $ docker rm dotnet
Running the application in the Docker containers
We’re now ready to run the application! Make sure you’ve got an open Docker Quickstart terminal window. First we start the .NET side
$ docker run -it --name=dotnet -h dotnet test-booksdemo-dotnetside bash
 $ cd /usr/local/DotNetSide
 $ mono JNBDotNetSide.exe
 JNBDotNetSide, Copyright 2004-2015, JNBridge, LLC
 Starting .NET-side server
 Hit <return> to exit
In the Docker run command, above, we started up the booksdemo-dotnetside image in a container named dotnet. The container is running an interactive session using the bash shell. We’ve also told the container that it should consider its host name to be dotnet. This will be used when we link to it over the Docker server’s virtual network. After we did that, we started up the .NET side.
Next we start the Java side. Open a second Docker Quickstart terminal window (the first one is being used by the .NET side), and issue commands:
$ docker run -it --name=javaside --link=dotnet -p 9000:9000 booksdemo-javaside bash
This command starts up a container named javaside running the booksdemo-javaside image. We also tell the container that it should know about another container with hostname dotnet, so that it can connect to it on Docker’s virtual network (recall that we configured the Java side with the property dotNetSide.host=dotnet), and we published javaside’s port 9000 (the one the Play Framework server will be listening on) and mapped it to port 9000 of the Docker server’s default IP address (the one presented to the outside world). That default IP address can be found by observing the output when a Quickstart terminal window was opened:

The default IP address is 192.168.99.100.
Note that it’s possible to automate the setting up and running of multiple containers and setting up networking between them using Docker Compose, but we felt it was important to show how to do this manually.
The javaside container was started as an interactive session, running bash, so let’s start the Play server:
$ cd /app/book-demo
 $ activator
 $ run
The Java side and the .NET side are both running, so let’s access the Java-side web server. Open a browser and visit http://192.168.99.100:9000.
And it works:

As does clicking on the various authors:


That’s all there is to it.
In this lab, we showed how to
- Build Docker images for the Java and .NET sides.
- Download pre-built images of the Java and .NET sides, and modify them.
- Start up the Java and .NET sides in their own containers, network them, and access them from a web browser
At this point, you should be able to Dockerize any JNBridgePro-enabled application that can use Mono for its .NET side.
Are you planning to use Docker with a JNBridgePro-enabled application? If so, please let us know.